
Last updated: November 12, 2026
Smoking a Thanksgiving turkey on the Traeger is our family’s favorite Thanksgiving tradition: juicy meat, crisp mahogany skin, a gentle smoke running through it, and the oven left free for everything else. The grill does the work while you actually get to be at your own Thanksgiving.
If you’ve never smoked a turkey before, this is a forgiving place to start. A turkey is one of the easier things to smoke, in my humble opinion, and it is FANTASTIC. Here’s exactly how I do it, from the dry brine two days out to the carve.
The brine: dry brine first. The exact dosing lives in my turkey brine recipe. It starts 48 hours ahead.
The rub: a rosemary, lemon, and garlic butter over (and under) the skin, with aromatics in the cavity.
The cook: 3 hours on the Traeger’s smoke setting (165–180°F), then 350°F until the breast reads 165°F, about 7 hours total for a 15 lb bird.
The rest: a good 20 minutes uncovered before carving, so the skin stays crisp.
Table of Contents ▾
Click a topic below to be taken directly to that section.
› The Advantages of Smoking Your Turkey
› My Second Chance at a Smoked Turkey
› Should You Brine Your Turkey?
The Advantages of Smoking Your Turkey on the Traeger
Not only does slow smoking your turkey help keep the meat super juicy, it also infuses that awesome smoky hardwood flavor using your favorite variety of wood pellets. Another great thing about cooking your turkey outdoors is that it frees up your oven for all the other mouthwatering side creations your family and friends expect.
Perhaps the only downside is that your house will not have that heavenly roasted turkey smell until you bring it in the house. But don’t worry, the smoked turkey aroma will definitely make up for the lost time.

A Quick Story: My Second Chance at a Smoked Turkey
We didn’t even host at our house last year, we were invited to a family member’s home, where they’d be serving a honey-baked ham with all the trimmings. Okay, I could deal with that, I guess, though I was a little bummed I wouldn’t get to smoke a turkey that year.
Smoking a whole turkey is one of my favorite cooks, and the flavor can be amazing, but it’s something I mostly only do once a year, for Thanksgiving. I always mean to do it more often. Then the leftover-turkey burnout from the holiday sets in, and it slips right off my radar.
So there I was, feeling down and promising myself I’d smoke one the following month to make up for it, when the hosts called. Would I mind smoking a turkey and bringing it along? They knew how much everyone had loved my turkeys in the past, and it would be great to have one alongside the ham.
Trying hard not to let on how excited I suddenly was, I answered as casually as I could manage: “Sure, I guess I can do that.” And so it was on! I started planning right away, equipment checked, recipe decided, ingredients gathered. And thankfully, there was still time for a dry brine.
Should You Brine Your Turkey?
Oh, did I forget to mention brining? Let me fill you in on a little secret: the absolute best way to smoke a turkey is to brine it first.
My preferred method is a dry brine, no bucket, no mess, and in my opinion better flavor, because the bird seasons in its own juices instead of soaking up water that dilutes them.
A wet brine is a fine, proven method too, but dry brining is easier and the skin comes out ahead, which matters even more on a smoker, where a dry surface takes smoke better and crisps instead of steaming.
The full how-to (the exact salt dose by weight for both kosher salt brands, the 48-hour fridge timeline, and the mistakes that make a bird come out too salty) lives in my Turkey Brine Recipe (Dry Brine, No Bucket).
Think of the two articles as a pair: brine it there, smoke it here. If you want the deeper science first, there’s also my guide on how to brine meat and my comparison of dry brining vs. wet brining.
One timing note before we cook: brining means this recipe starts two days before Thanksgiving. The brine does its work in the fridge while you do nothing, but put it on the calendar.

🔥 THE GRILLING LIFE
Traeger Smoked Thanksgiving Turkey Recipe
Dry brined, herb-buttered, and smoked low, then roasted to finish. Plan two days ahead for the brine.
Ingredients
- 1 turkey, 15 lb, dry brined (see the brine recipe)
- ⅓ cup softened butter or olive oil
- 3 Tbsp chopped fresh rosemary leaves
- 5 cloves garlic, minced
- 1 Tbsp shredded lemon peel
- 1 tsp coarse-ground black pepper
- salt, for flavor (go easy on a brined bird)
- 10 fresh rosemary sprigs
- 5 fresh thyme sprigs
- 10 cloves garlic, peeled
- 2 shallots, chopped
- 1 onion, cut into 1-inch chunks
- 2 lemons, cut into 1-inch chunks
- 2 cups chicken broth, for the roasting pan
The bird is dry brined 48 hours ahead; the brine itself is the companion Turkey Brine Recipe on this site. Go easy on any extra salt, since a brined bird brings its own.
Method
- Brine the turkey. Dry brine the turkey 48 hours ahead; the companion Turkey Brine Recipe on this site has the full method. Put it on the calendar, then let the fridge do the work.
- Prep the bird. Remove the giblets and pat the turkey dry, inside and out, with paper towels. Skip the rinse: it does not remove bacteria, it just splashes them around the sink, and the cook takes care of them.
- Load the cavity. Fill the cavity with the rosemary sprigs, thyme sprigs, peeled garlic cloves, shallots, and the onion and lemon chunks.
- Herb butter, everywhere. Mash the butter with the chopped rosemary, minced garlic, lemon peel, and pepper. Rub it over every inch of skin and work as much as you can up under the skin, too. Why: Butter spread only on top mostly flavors the skin; under the skin is what actually seasons the meat.
- Pan and broth. Set the bird in a roasting pan and pour the 2 cups of chicken broth into the bottom, just a shallow layer to keep the drippings from scorching. You are not filling the pan; the bird roasts, it does not swim.
- Smoke for 3 hours. Traeger on the smoke setting (165-180F, or Super Smoke if your grill has it) for the first 3 hours. Let the grill do the work.
- Roast to 165F. Raise the grill to 350F and cook until the thickest part of the breast reads 165F, about 4 more hours for a 15 lb bird, basting with the broth and pan juices about once an hour. The thermometer decides, not the clock. Why: Times shift with the bird and the weather; temperature is the finish line that never lies.
- Rest, then carve. Rest the bird uncovered for a good 20 minutes before carving, so the skin stays crisp. Save everything in the pan: the broth and drippings are a head start on the best gravy of the day.
 thegrillinglife.comRecipe data and Google schema generated from one source by the TGL Recipe Card plugin.

The Ingredients, With Notes
I started with a beautiful fresh, unfrozen, organic 15-pound turkey, and boy, was I lucky to get it. As I said, it was pretty last minute (the day before Thanksgiving) and it was the last one left at that size that wasn’t frozen. I went with a simple, tried-and-true recipe that year because of the timeframe I had to work with.
That is not to say it’s a bad recipe (it’s still one of my favorites), but I usually like to experiment and try new ideas.
The seasoning is a rosemary, lemon, and garlic mix I’ve used many times on whole chickens and turkeys:
- 10 fresh rosemary sprigs, plus 3 tablespoons chopped fresh rosemary leaves
- 5 fresh thyme sprigs
- 2 shallots, chopped
- 10 cloves garlic, peeled, plus 5 cloves garlic, minced
- 1 onion, peeled and cut into 1-inch chunks
- 2 healthy-sized lemons, cut into 1-inch chunks, plus 1 tablespoon shredded lemon peel
- ⅓ cup olive oil or softened butter (I used butter on mine)
- 1 teaspoon coarse-ground pepper
- Salt for flavor (go easy if your bird is dry brined; it brings its own)
- 2 cups of chicken broth
Start by removing the giblets, then pat the turkey dry, inside and out, with paper towels, no rinsing. The USDA advises against rinsing poultry: it doesn’t remove bacteria, it just splashes them around your sink, and the cook takes care of them anyway.
Load up the turkey’s belly with the rosemary sprigs, thyme sprigs, cut lemons, peeled garlic cloves, shallots, and onion chunks. Mix the remaining ingredients in a bowl and smash them together with the softened butter.
Rub and massage the bird from top to bottom with the butter mix, taking care to coat every inch of skin so every bite is loaded with flavor.
Work as much of it as you can up under the skin, too, that’s what actually seasons the meat. Butter spread only on top mostly flavors the skin, because herbs and garlic can’t work their way through it.
Sprinkle extra rosemary over the outside of the bird, and if your bird is brined, go easy on any extra salt in the butter, since the brine already seasoned it.
Next, pour the 2 cups of chicken broth into the bottom of your roasting pan, just a shallow layer to keep the drippings from scorching. You’re not filling the pan; the bird roasts, it doesn’t swim. Set the bird in, and you’re ready to go.
Smoking the Turkey on the Traeger
I decided to use the Traeger pellet grill this year instead of my Big Green Egg. The main reason was that I had to start smoking the bird at 5 a.m. due to an early dinner start time, and the Traeger is a very easy-to-use option compared to charcoal smoking.
You can literally set your desired temperature on the Traeger, insert a wireless meat probe with automatic alerts, and go back to bed if you want to.
Into the Traeger our bird went, with the setting on smoke (165–180°F, or Super Smoke if your grill has it) for the first 3 hours.
Give that bird a good long smoke, let the grill do all the work while you get busy on other things. When the three hours were up, I moved the temperature to the 350°F setting and let her cook until she reached a 165°F internal temperature. That took close to another 4 hours for the turkey to reach the proper, safe temperature.
I basted the bird about once every hour during this later part, spooning the broth and pan juices over the skin.
Timing by bird size: same method (3 hours of smoke, then 350°F to 165°F):
| Bird | Smoke | At 350°F | Total (about) |
|---|---|---|---|
| 12 lb | 3 hrs | ~3¼ hrs | ~6¼ hrs |
| 14 lb | 3 hrs | ~3¾ hrs | ~6¾ hrs |
| 15 lb | 3 hrs | ~4 hrs | ~7 hrs |
| 18 lb | 3 hrs | ~4¾ hrs | ~7¾ hrs |
| 20 lb | 3 hrs | ~5¼ hrs | ~8¼ hrs |
Treat the table as a planning guide, never the finish line: the thermometer decides. Cook to temperature, not time.
Since the turkey is always the center of attention at every Thanksgiving meal, make sure it’s cooked perfectly by using a wireless meat probe and an instant-read thermometer.
I can’t begin to tell you how much simpler your life will be with a good wireless remote meat thermometer for long cooks. I have reviewed several great options here: The 10 Best Wireless Digital Meat Thermometers.
Finally, I wrapped the whole roasting pan (bird and all) in tin foil, then wrapped it again in towels for the ride to our family’s house.
If you’re not transporting the bird, let it rest uncovered for a good 20 minutes before carving. Covering it up with tin foil will make the skin less crisp. Either way, save what’s in that pan, the broth and drippings are a head start on the best gravy of the day.

Turkey FAQs
The questions every Thanksgiving cook asks, including the two that decide whether the day works at all.
How long does a frozen turkey take to thaw?
In the fridge, plan on about 24 hours for every 4–5 pounds, a 15 lb bird needs 3 to 4 days. Put it on a tray (it will leak) and start earlier than you think.
And remember, this recipe’s dry brine needs 48 hours after the thaw, so a frozen 15 lb bird wants to come out of the freezer about six days before Thanksgiving.
Short on time? The cold-water method works too: about 30 minutes per pound in cold water, changed every 30 minutes, a 15 lb bird thaws in roughly 7 to 8 hours.
How big a turkey do I need?
Plan on 1 to 1½ pounds per person. A 15 lb bird feeds about 10 people generously, with a fair shot at leftovers.
Which pellets should I use?
A fruitwood like apple or cherry, or a signature/competition blend, something mild that lets the rosemary and lemon talk. Save the heavy mesquite for beef.
Do I brine AND use the herb butter?
Yes. They do different jobs. The brine seasons the meat itself and keeps it juicy; the butter flavors the skin and the surface. If you dry brine, just go easy on any extra salt in the butter.
Can I make this on a different pellet grill, or in the oven?
Any pellet grill that can hold a smoke setting and 350°F cooks it the same way. In an oven, skip straight to the 350°F stage, you’ll lose the smoke, but the brine and the herb butter still carry the bird.
How long do smoked turkey leftovers keep?
Get leftovers into the fridge within 2 hours of the meal. They’ll keep 3 to 4 days in the fridge, or freeze them for up to about 3 months. At our house, they have never once made it to day three.
Final Thoughts
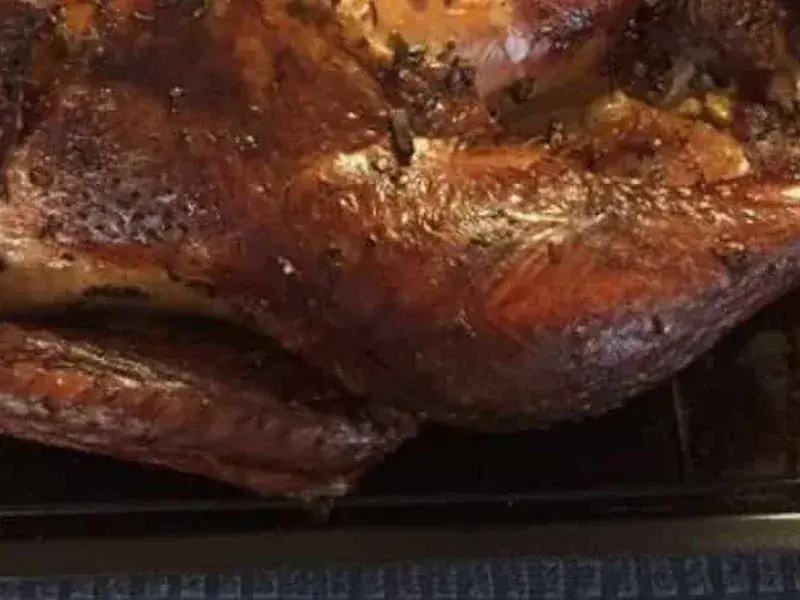
I am happy to say that the Traeger smoked Thanksgiving turkey was a success. It was moist and dripping with juices, with a nice, mild smoky flavor that went very well with the rosemary, lemon, and garlic recipe. And much to my delight and disappointment, there were no turkey leftovers to take home.
Oh well, looks like I will have to smoke another turkey next month after all. Darn! 🙂
Do you want the ULTIMATE Thanksgiving Turkey recipe? Check out The Mad Max Turkey Method for Roasting Turkey. This method and recipe are no joke.
I hope you’ve enjoyed my Thanksgiving turkey story and that you have a great Thanksgiving with your loved ones as well. If you try this recipe or have one of your own to share, we’d love to hear about it in the comments below. Sharing is caring, my friends! Cheers, Patrick
If you want the whole Thanksgiving cook in one place
This post walks the smoke itself, start to finish. But a Thanksgiving turkey starts a couple of days before the Traeger is lit: the brine, the timing by the size of your bird, the rest, the carve, and the handful of places where the day can go sideways.
That is why I put the whole cook together as a walkthrough. The Turkey Walkthrough is the full day step by step: the brine, the setup, timing by size, resting, and the works. It lives in my Etsy shop, and it is my own product, said out loud, because that is how we do things here.
👉 Get The Turkey Walkthrough on Etsy
Plan the day once, then just cook it.
Now it’s your turn: I want to hear from you: do you have a helpful tip to share, or advice I may have missed? Have you tried this recipe? Let me know by leaving a quick comment below. If you still have questions, please feel free to send me a message. Cheers, Pat G.

About the cook: Patrick is the founder of The Grilling Life and a Certified Carnivor with over 20 years of outdoor cooking behind him, Traeger, Big Green Egg, kettle, and drum, five-plus nights a week, rain or shine. Every recipe here is cooked in his backyard in Lathrop, California and pulled by temperature, not by the clock. His temperature charts and cook planners live in The Grilling Life shop on Etsy.
Disclosure - At The Grilling Life, I am committed to researching and writing thoughtful, informative and editorially independent reviews of the best products for your outdoor cooking needs. If you like what I do, you can support me through my chosen links, which earn me a commission. This allows me to continue sharing with you my love for all things barbecue. Your support is truly appreciated.

Latest Comments